

Saturday, December 24, 2011
Snuggled in for Christmas
I hope everyone is all snuggled in with their families this Christmas Eve...
 Enjoying some Christmas baking...
Tuesday, December 20, 2011
One Chandelier at a Time

Monday, December 19, 2011
Rustic Stone Christmas Mantel

Thursday, December 15, 2011
DIY Wrapping Paper
I promised last week when I shared our family Christmas tree that I would give a little tutorial on my DIY wrapping paper. For years I've wrapped presents in brown and white Kraft paper and dressed them up with satin bows, raffia, burlap, tiny pinecones, and ornaments, but this year I was inspired to dress them up a bit more after purchasing several different stencils online.


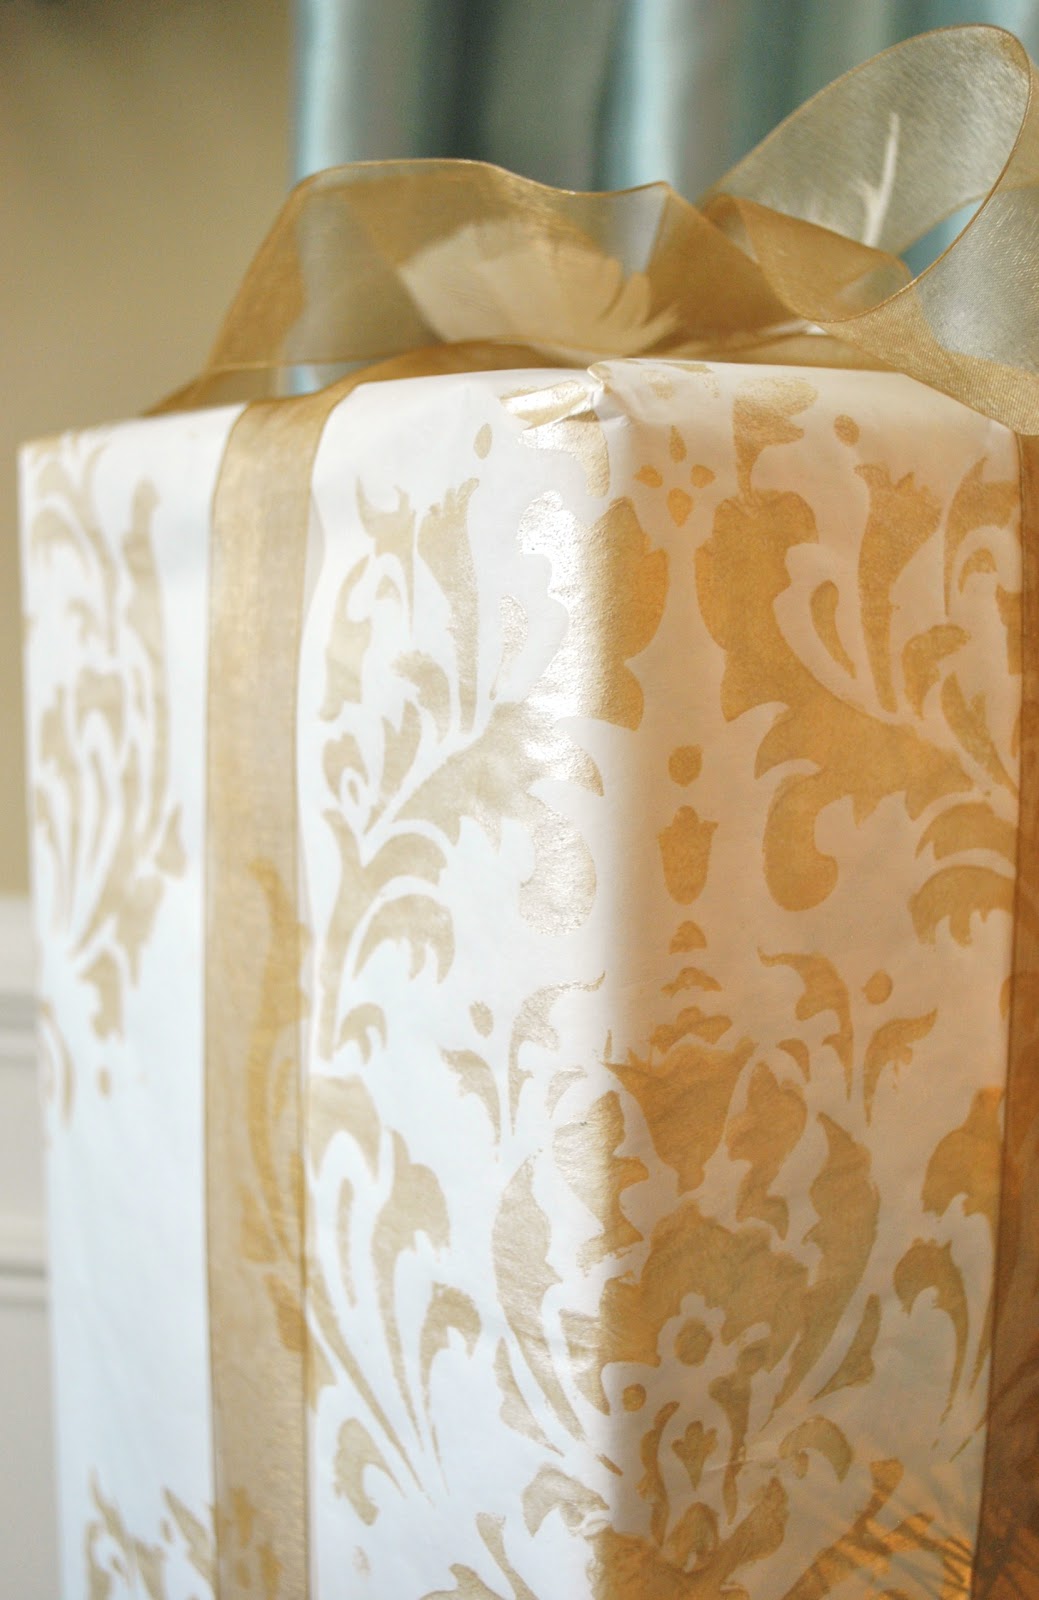

There are so many great stencils out there these days and the number of uses for them is endless, including making custom wrapping paper. One of my favorite stencils I have is a brocade stencil that I purchased through Overstock for under $10.
Saturday, December 10, 2011
Christmas Cabinet Vignette
I couldn't resist spreading my free greenery everywhere I could around the house for Christmas. I love the way it drapes and softens the hard edges of cabinets and mantels. I have a wonderful old cabinet that used to hold my clock collection that I've decided to swap out for my wedding china and it too was covered in greenery and topped with a little Christmas vignette...
 I was so happy to see that my "perfect shade of blue" antique wine jug and the wedding china made the move across the country without breaking!

Thursday, December 8, 2011
The Trick to a Larger-Looking Christmas Tree
Right now I have a very small artificial tree that you can practically see through after setting it up. It may have fit in our old home, but it looks a little lost in the new house. Since my husband's allergies prevent us from having one of those wonderful North Carolina Fraser Firs, my job is to use the one we have and give it a little presence...


Instead of placing the tree on the floor, I set it up on an old wooden trunk from the garage and draped a ruffled blanket and other linens over it to soften the look and cover the metal tree base.
Wednesday, December 7, 2011
Nature-Inspired Holiday Dining
I'm crazy over birds. I know they've been popular for a while now, but my love of them goes back to my childhood on the dairy farm when I'd rescue baby cliff swallows from the barn cats after their little mud nests had broke. I spent most of my time in the summer hunting down food for the little guys to eat and eventually set them free when they were big enough.

My love of birds has continued over the years and my much of my decorating style revolves around nature-inspired elements like birds, nests, branches, and moss. When it came to decide what my holiday table was going to include this year, I knew that it needed to be subtle, muted and coincide with my new dining room that I just finished furnishing.

My love of birds has continued over the years and my much of my decorating style revolves around nature-inspired elements like birds, nests, branches, and moss. When it came to decide what my holiday table was going to include this year, I knew that it needed to be subtle, muted and coincide with my new dining room that I just finished furnishing.
Will This Tree Ever Stop Blowing Away?
I couldn't help myself... I have been wanting to share my little front porch with all of you, but my darn tree literally keeps blowing away. The fact that it's in a big bucket with a bunch of large rocks and water and it still blows away tells you that our street (or maybe it's North Carolina?) gets some gusty winds. It seems like you have to keep things nailed down around here. Anyway, my little front porch tree isn't looking too swell anymore and either is my cute little black lantern...because the tree fell on it and broke the glass out of one side. Live and learn, huh? Note to next year self: Do not buy cute little Fraser fir tabletop tree at Home Depot for the front porch!
 The front porch is still very much a work-in-progress for me. I've been focusing most of my attention to the inside of our new house and if I hadn't found these $15 Ballard Design chairs on Craigslist, I probably wouldn't have anything out there yet. They need a bit of cleaning up and some cute black and white damask outdoor pillows, don't they? Wonder if they'll blow away too?

Tuesday, December 6, 2011
Christmas Stairs
Ever since I was a little girl, I've always wanted "Christmas Stairs". I grew up in a one-level home and I thought houses with stairs were the best, especially those with banisters that could be decked out for the holidays. Even our realtor would say when we went through houses last summer, "It has Christmas Stairs!" Well...I got my Christmas stairs in the new house. This is what we saw when we first walked in the door a few months back...


Monday, December 5, 2011
A Christmas Mantel
After showing you some sneak peeks of my Christmas decor, I wanted to share the finished mantel for my formal living room. Even though it's a new house, I only purchased a few items for all my Christmas decorating, including the boxwood wreath. I've always wanted one and I figure I can use it all year around in different places around the house.
 All my greenery throughout the house was free from a local tree farm. I stopped by to see if they had fresh garlands...which they didn't, but I got a truckload of free trimmings that they were about to haul away. Score!

Sunday, December 4, 2011
Aged to Perfection

Subscribe to:
Posts (Atom)